Picking your 4th of July nails shouldn’t take longer than picking your outfit, but with this many pretty options floating around, it’s easy to fall down a rabbit hole of inspiration. This roundup pulls together 45 of the prettiest red, white, and blue nail looks out there, from five-minute manicures to detailed nail art worth showing off in every holiday photo.
Whatever your skill level or time budget, you’ll find something here that fits — soft nude looks for anyone who wants a subtle nod to the holiday, bold tie-dye and swirl designs for the nail art lovers, and a handful of clever twists on the classic French manicure. Save your favorites now so you’re not scrambling for ideas the night before.
Here are 45 gorgeous 4th of July nail ideas, arranged so you can move from simple to statement-making at your own pace.
1. Star Tips
A fresh twist on the traditional French manicure, this design swaps the plain white tip for tiny stars painted across the nail edge instead. It keeps the elegant shape of a French mani while adding just enough holiday detail to feel intentional rather than an afterthought.
This is a great option for anyone who already loves French tips but wants something less predictable for the holiday. The stars can be as small and subtle or as bold and scattered as you like, which makes the design easy to adjust to your personal style.
Tips for Star-Tipped French Nails
- Use a fine detail brush for cleaner, smaller star shapes
- Stick to one or two star colors so the tip doesn’t feel busy
- A glossy top coat helps the stars catch the light nicely in photos
2. I Heart America
Heart-shaped French tips get a patriotic makeover here, swapping the usual soft pink or white for a red, white, and blue combination. Heart tips are already one of the prettiest nail trends around, and adding the patriotic palette makes them feel perfectly suited to the holiday without losing any of their charm.
This design is easier to recreate than it looks, since the heart shape is really just two curved lines meeting at a point. It photographs beautifully and works on nearly every nail length and shape.
Tips for Heart-Shaped Tips
- Practice the heart curve on paper first if you’re newer to shaped tips
- Keep the heart color and base color in contrast for a crisp, clean look
- A striping brush gives more control than a regular polish brush for the curved lines
3. Nude Star Manicure
A soft nude base topped with simple white stars keeps this design understated, versatile, and easy to wear well beyond the holiday itself. It’s proof that you don’t need bold red or blue to nod to the 4th of July — a few well-placed stars are enough to make the connection.
This is one of the most work-appropriate options on the list, since the nude base reads as polished and professional even with the star detail. It’s also a forgiving design for nail art beginners, since the stars don’t need to be perfectly uniform to look good.
Tips for Subtle Star Nail Art
- Choose a nude shade close to your natural nail color for the most versatile base
- Keep stars small and scattered rather than large and centered
- White nail art pens are easier to control than polish for tiny star shapes
4. Red & Blue Swirls
Flowing red and blue swirls across the nail add movement and a bit of drama without needing any precise lines or shapes. Swirl nail art has stayed popular for a reason — it looks intricate but is actually one of the more forgiving techniques to attempt at home.
The organic, wave-like pattern means small imperfections blend right into the design instead of standing out. This is a great pick if you want something that feels artistic and eye-catching but don’t want to stress over perfectly straight lines.
Tips for Swirl Nail Art
- Use a thin nail art brush and a light hand for smoother swirl lines
- Work with wet polish so the swirls blend slightly at the edges
- Two colors work best — three or more can make the swirl pattern look muddy
5. Half Red Nails
Half the nail in a solid red, the other half left bare or in a neutral base, creates a clean, modern look that’s genuinely wearable past the holiday weekend. It’s one of the easiest ways to add a patriotic touch without going full nail art.
Because only half the nail is colored, this design also grows out more gracefully than a full-coverage polish, giving you a little more time before a touch-up is needed. It’s an especially good choice if you want your 4th of July nails to double as your everyday look for the following weeks.
Tips for Clean Half-and-Half Nails
- Use nail tape to create a crisp, straight dividing line
- Vertical or diagonal splits look more modern than a strict horizontal line
- Seal the border with top coat to prevent chipping right at the color line
6. Inspired by Berries
Blueberries and strawberries lend their natural colors to this design, translating summer fruit into a red and blue palette that feels fresh rather than overtly patriotic. Small round shapes and clusters of color mimic the look of berries scattered across the nail.
This is a fun option if you love the 4th of July’s color palette but want a design that connects to the season rather than the flag specifically. It works well paired with other summer-inspired manicure trends throughout the season.
Tips for Fruit-Inspired Nail Art
- Use a dotting tool to create small, round “berry” clusters
- Add tiny white highlight dots to give the berries dimension
- Keep the color palette limited to two main shades for a cohesive look
7. Spiral Tie N Dye
A spiral tie-dye pattern in red, white, and blue turns each nail into a small, swirling burst of color. It’s a step up in difficulty from a standard tie-dye look, since the spiral shape requires a bit more control, but the payoff is a design that looks genuinely impressive.
This is a great pick for anyone who enjoys a bit of a nail art challenge and wants a design that stands out in photos. The spiral shape also means no two nails ever look exactly the same, which adds to the handmade charm.
Tips for Spiral Tie-Dye Nails
- Start colors from the center of the nail and work outward in a spiral motion
- Work with wet polish and a fine brush to help the colors blend at the edges
- Practice the spiral motion on paper before attempting it on the nail
8. American French Mani
The classic French manicure gets reworked in all three patriotic colors instead of the usual white tip. This version keeps the elegant, timeless shape everyone loves about a French mani while making it unmistakably suited to the holiday.
Because the structure is so familiar, this is an easy design to recreate even if you don’t consider yourself especially skilled at nail art. It photographs well against tan skin and pairs easily with almost any holiday outfit.
Tips for a Tri-Color French Manicure
- Use nail guides to keep each colored tip clean and even
- Alternate which color goes on which nail for visual variety
- A glossy top coat gives this classic style its signature polished finish
9. Matte Blue Manicure
A solid matte blue manicure proves that sometimes the simplest option is also the chicest. Matte finishes instantly make any color look more elevated, and a deep or bright blue captures the holiday spirit without needing red or white at all.
This is one of the fastest looks on the list to recreate, since it’s essentially a single-color manicure with a matte top coat swapped in for the usual glossy finish. It’s a strong choice if you want your nails to look intentional and put-together with minimal effort.
Tips for a Flawless Matte Manicure
- Apply matte top coat only after the color has fully dried
- Avoid touching the nail once matte top coat is applied — it can leave marks
- Matte finishes show smudges more than glossy ones, so work carefully near cuticles
10. French Cherry Pie
A classic white French tip gets topped with tiny painted cherries for a design that leans into the fun, food-inspired side of summer. Cherries are a natural fit for the holiday’s red color scheme, and the playful detail keeps this from feeling like a typical French manicure.
This design works especially well if you want something a little whimsical rather than strictly patriotic. It’s an easy way to bring personality into a classic, timeless nail shape.
Tips for Painted Cherry Details
- Two small red dots connected by a thin green stem create the basic cherry shape
- Add a tiny white highlight dot on each cherry for extra dimension
- Keep cherries on just one or two nails per hand as an accent detail
11. Sparkly Ombre
A tri-color ombre fade gets an extra boost from chunky glitter layered over the blended colors. This design takes the classic ombre technique up a notch, adding texture and sparkle that photographs beautifully in both daylight and evening fireworks lighting.
This is a great option if you love ombre nails but want something with a bit more visual impact for the holiday. The glitter also helps disguise small imperfections in the color blend, making it more forgiving than a plain ombre.
Tips for Glittery Ombre Nails
- Blend the base colors first, then add glitter once the ombre has dried
- Use a makeup sponge to apply glitter in a gradient for a more intentional look
- Seal glitter with a thick top coat to prevent snagging
12. Side French Nails
Instead of a traditional tip, the color sits along one side of the nail in this modern take on the French manicure. It’s a simple shift in placement that makes a familiar style feel current and a little more unexpected for the holiday.
This design is easy to customize with red, white, or blue depending on which side you choose to highlight. It’s also one of the quicker looks on this list, since it only requires one clean line rather than a full tip or pattern.
Tips for Side French Nail Placement
- Use tape or a nail guide to keep the diagonal line crisp
- Try alternating which side gets color across different nails for variety
- Keep the rest of the nail sheer or nude so the side detail stands out
13. Popsicle Inspired
Red, white, and blue in horizontal bands recreate the look of a classic rocket pop popsicle, tapping into pure summer nostalgia. It’s one of the most universally recognizable patriotic designs, since almost everyone associates that color combination with the holiday.
This look works well on any nail shape and is easy to adjust — go for hard color blocks for a graphic effect or soften the lines slightly for a more blended, painterly finish. Either way, it’s an instant crowd-pleaser.
Tips for Popsicle-Inspired Color Blocking
- Use striping tape to keep the color bands straight and even
- Three even sections (red, white, blue) work best proportionally
- A glossy top coat enhances the popsicle-like shine
14. Criss-Cross on White
A crisp white base gets layered with red and blue criss-crossing lines for a design that’s simple to execute but still visually interesting. The geometric pattern gives this look a slightly more modern, less “themed” feel compared to more literal flag or star designs.
This is a good option if you want something a little more unique than a standard red-white-and-blue color block but still easy enough to do yourself. The white base keeps everything looking clean and bright.
Tips for Criss-Cross Line Art
- Use a striping brush for the straightest, most even crossing lines
- Let each line dry slightly before adding the next to avoid smudging
- Keep spacing between lines consistent for the neatest overall pattern
15. Nude Wonder Woman Nails
A subtle, elegant design inspired by Wonder Woman’s color palette brings in touches of red, gold, and blue over a soft nude base. It’s patriotic in spirit without leaning on stars, stripes, or flags directly, giving it a more sophisticated, editorial feel.
This design works well for anyone who wants their holiday nails to carry a bit of symbolism or personality beyond the standard color scheme. It’s also easily adapted — swap in different accent colors while keeping the nude base for a similar effect.
Tips for Subtle Themed Nail Art
- Use gold foil or gold polish sparingly as an accent rather than a main color
- Keep the nude base consistent across all nails for a cohesive look
- Add color accents to just two or three nails to keep it elegant
16. Star Accents on Nude
A nude ombre base topped with a champagne glitter coat gets finished off with a few small star accents for extra sparkle and holiday spirit. The glitter and nude combination alone would work as a standalone manicure, but the stars tie it clearly to the occasion.
This is one of the more glamorous options on the list, striking a nice balance between soft, wearable color and eye-catching sparkle. It photographs especially well in evening light, which makes it a great choice for a fireworks display.
Tips for Glitter and Star Combinations
- Apply glitter with a sponge for a smoother, more even gradient
- Add star accents after the glitter has fully dried and been sealed
- Rhinestone stars can be swapped in for painted ones for extra shine
17. Captain America Inspired
A design inspired by the iconic Captain America color scheme swaps traditional white for a striking silver, adding a bit of extra shine and edge to the classic red-white-and-blue palette. It leans into superhero energy while still fitting comfortably within the holiday theme.
This look requires a bit more artistic confidence than some of the simpler designs on this list, since it typically involves a star motif and structured color blocking. The silver swap is what makes it feel distinct from a standard patriotic mani.
Tips for Silver-Accented Patriotic Nails
- Chrome or metallic silver polish gives the most eye-catching finish
- Use the silver as an accent color rather than covering the whole nail
- Pair with a bold red and deep blue for the strongest color contrast
18. Red Cherry Idea
A vibrant, poolside-inspired design brings cherries back into the mix, this time paired with brighter, punchier colors for a bolder overall effect than the French cherry pie look. It’s a fun, summery option that leans into fruit imagery rather than flags or stars.
This design works particularly well for pool parties or daytime gatherings, where a bright, playful manicure fits the mood. It’s an easy way to bring in red without relying on more literal patriotic symbols.
Tips for Vibrant Cherry Nail Art
- Use a glossy top coat to make the red cherries look juicy and dimensional
- Add a small green leaf detail next to each cherry for realism
- Keep the background color light so the cherries stand out clearly
19. Sparkly 4th of July Nails
Foil accents in red and blue scattered over a sparkly champagne base bring texture and shine to this design without much extra effort. Foil is one of the easiest ways to elevate a simple sparkly manicure into something that photographs like it took much longer to create.
This is a great pick if you want glamour without complexity — the champagne base does most of the visual work, and the foil accents just add a bit of patriotic color on top. It’s also a design that holds up well through a long day of celebrating.
Tips for Foil Accent Nail Art
- Apply foil adhesive in small sections rather than covering the whole nail
- Press foil firmly and peel slowly for the cleanest transfer
- Seal foil accents with top coat to prevent them from lifting
20. Cute 4th of July Nails
A simple white manicure gets a patriotic upgrade with a touch of blue nail art on one or two accent nails. This is one of the most beginner-friendly designs on the list, since most of the nails stay a clean, solid white while only a couple carry any detail.
This look is a great option if you want a manicure that’s easy to maintain and touch up throughout the holiday weekend. The white base also makes it easy to swap in different accent colors depending on your mood.
Tips for White Base with Accent Detail
- Choose just one or two nails per hand for the patriotic accent
- Keep the accent design simple — a few stars or dots is enough
- A bright white base (rather than off-white) gives the cleanest contrast
21. Everything Patriotic
This design brings together several patriotic elements — stripes, stars, and solid color blocks — spread across different nails rather than repeating the same motif ten times. It’s a great pick if you like variety but still want everything to feel cohesive.
Because each nail carries a slightly different element, this look rewards a bit of planning before you start polishing. The payoff is a manicure that feels complete and detailed without any single nail being overly busy.
Tips for Combining Multiple Patriotic Elements
- Assign each element (stripes, stars, solids) to specific nails before starting
- Keep at least one or two nails solid-colored as a visual break
- Use the same three-color palette throughout for consistency
22. Shiny Star Nails
A glittery nude base becomes the backdrop for a scattering of star details, striking a balance between subtle and sparkly. The nude base keeps things sophisticated, while the glitter and stars add just enough shimmer and holiday spirit to stand out.
This is one of the more glamorous, low-key options on the list — festive enough for the occasion but still wearable for other events during the summer. It photographs especially well under evening or string lighting.
Tips for Glittery Star Details
- Apply glitter polish in thin layers to control the level of sparkle
- Add star details once the glitter base is fully dry
- A glossy top coat helps the glitter catch more light
23. French Nails with Moons
A negative space design incorporating red, white, and blue around the cuticle area creates an abstract, modern take on patriotic nail art. Instead of tips or full coverage, this style leaves part of the natural nail bare, which gives the whole look a lighter, more graphic feel.
This is a great choice for anyone who likes minimalist or abstract nail art and wants something that doesn’t rely on literal symbols like stars or flags. It works especially well on shorter nails, where less coverage can still make a strong visual statement.
Tips for Negative Space Nail Art
- Plan out the bare and painted sections before applying any polish
- A thin liner brush helps keep negative space edges clean
- Top coat the entire nail, including bare sections, for even shine
24. Tie N Dye Design
A mix of ombre and tie-dye techniques, softened with a nude undertone, creates a design that feels artistic without being overly bold. The tie-dye pattern adds texture and movement, while the nude base keeps the overall look wearable and soft.

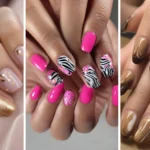
This is a good middle-ground option between a simple color mani and a fully detailed nail art design. It’s forgiving of small imperfections, since the tie-dye technique is meant to look a little organic and unpredictable.
Tips for Soft Tie-Dye Nail Art
- Use a makeup sponge to dab and blend colors for a softer tie-dye effect
- Keep the nude base thin so it doesn’t overpower the dyed colors
- Work quickly while polish is wet for the smoothest color blending
25. Ombre Nail Design
A classic red-to-white-to-blue ombre fade remains one of the most timeless patriotic nail looks, and for good reason — it’s simple, striking, and works on virtually every nail shape and length. There’s a reason this technique has stayed popular for years.
This design is a great option if you want something recognizably festive without needing any fine detail work. It’s also one of the more approachable techniques for anyone newer to at-home nail art.
Tips for a Classic Three-Color Ombre
- Blend one color transition at a time rather than all three colors at once
- A makeup sponge gives smoother results than trying to blend with a brush
- Thin coats of each color blend more seamlessly than thick ones
26. Simple 4th of July Nails
A solid red base paired with a small blue star accent keeps this design refreshingly simple while still clearly celebrating the holiday. It’s proof that you don’t need multiple colors or intricate patterns to make a manicure feel intentional and festive.
This is one of the easiest designs on the entire list to recreate, making it a solid choice if you’re short on time but still want your nails to match the occasion. The single star accent keeps the focus on clean, glossy color.
Tips for Simple Star Accent Nails
- Choose one accent nail per hand rather than repeating the star on every nail
- A bold, glossy red gives the cleanest base for this look
- White or blue star nail decals are a quick shortcut if freehand isn’t your thing
27. Everything Holiday
Small illustrated details spread across the nails — from stars to seasonal icons — capture the overall spirit of the holiday in miniature form. It’s a design that leans into cuteness and personality rather than a single unified pattern.
This is a fun option if you want your nails to feel like a tiny celebration in themselves. Because the details are small and varied, this design also gives you room to add your own personal touches or seasonal symbols.
Tips for Illustrated Holiday Nail Art
- Use a fine detail brush for small illustrated icons
- Limit detailed illustrations to two or three nails to avoid overcrowding
- Keep remaining nails solid-colored to let the illustrated ones stand out
28. Red Blue Foil Nails
For anyone who always gravitates toward nude polish, this design offers an easy, subtle way to join the holiday spirit with a few foil accents layered over a soft nude base. It keeps things soft and sophisticated rather than bold or graphic.
This is a great pick if you want your nails to work seamlessly with a variety of outfits, not just red-white-and-blue ones. The foil detail is subtle enough to read as elegant rather than costume-like.
Tips for Subtle Foil Accents
- Use foil sparingly — a few small pieces per nail is enough
- Nude or blush bases make foil accents stand out more clearly
- Press foil onto tacky adhesive rather than wet polish for the cleanest transfer
29. Red & Blue Frenchie
A softened, less overtly patriotic take on the French manicure swaps the traditional white tip for red or blue, creating a design that’s versatile enough to wear well beyond the holiday. It’s a great option if you want a manicure with staying power.
This look proves that you don’t need stars, stripes, or flags to nod to the 4th of July — simply shifting the tip color is enough to feel seasonally appropriate while still looking like a classic, everyday manicure.
Tips for a Wearable Colored French Tip
- Choose a deep, rich red or blue for the most polished tip color
- Keep the base sheer or nude so the tip color reads clearly
- This design transitions easily into a non-holiday manicure with no changes needed
30. Inspired by Firecrackers
Bursts of color radiating outward from a central point recreate the visual energy of a firecracker going off. This design is ideal for anyone whose favorite part of the holiday is genuinely the fireworks display itself.
The burst pattern is more forgiving than it might look, since small variations in line direction and length only add to the “explosive” effect rather than looking like a mistake. It’s a fun, expressive design for nail art fans.
Tips for Firecracker Burst Nail Art
- Flick the brush outward from a central point for the burst shape
- Layer two or three colors of bursts for extra depth
- Add tiny dots around the bursts to mimic sparks
31. Swirls and Stars
Hand-painted flags and stars combine with the swirl technique for a design that pulls together several patriotic elements into one cohesive look. Unlike a literal flag nail, this version softens the imagery with fluid, swirling lines.
This is a great option if you want a design that feels custom and a little artistic rather than following a strict pattern. Every set will look slightly different depending on how the swirls and stars are placed, which adds to the handmade charm.
Tips for Combining Swirls with Star Details
- Paint the swirl base first, then add stars once it’s dry
- Keep stars small so they don’t compete with the swirl pattern
- A fine liner brush works best for adding star details on top of swirls
32. Sparkle Over Red
A bold, glossy red base gets topped with a glittery silver top coat for one of the fastest, most effective ways to make a simple manicure feel festive. This design requires minimal skill but still delivers a polished, eye-catching result.
This is a great pick for anyone who wants their nails done quickly without sacrificing shine or holiday spirit. The silver glitter adds just enough sparkle to elevate the red without needing any additional colors or patterns.
Tips for a Glittery Red Base
- Apply glitter top coat over fully dried red polish for the cleanest finish
- Two thin layers of glitter top coat build shine without clumping
- A high-shine top coat seals in the sparkle and adds extra gloss
33. Shiny Red Design
Subtle, shiny half-red nails offer a simpler, quieter alternative to a full glitter or nail art look. Only part of the nail carries the red color, keeping the overall design understated while still nodding to the holiday palette.
This is a good option if you want something unique but still simple and low-maintenance. The half-coverage design also tends to grow out more gracefully than a full-nail color application.
Tips for Understated Half-Red Nails
- Use tape to create a clean line where the red section begins
- A glossy top coat gives the red section its shine and depth
- Pair with a nude or sheer base on the uncolored portion
34. Nude Nails for 4th of July
A soft nude ombre works for practically any festive outfit, making this one of the most versatile designs on the entire list. It’s also one of the easiest to recreate yourself, since it relies on simple color blending rather than detailed art.
This design proves that “4th of July nails” don’t have to be red, white, and blue at all — sometimes a soft, neutral base that matches your outfit is exactly the right call for the occasion.
Tips for a Versatile Nude Ombre
- Choose two close nude shades for the most subtle, natural-looking blend
- A makeup sponge creates smoother gradients than a brush
- This base pairs easily with removable stick-on stars if you want a temporary patriotic touch
35. Side Frenchie
A festive take on the trendy side French style features an actual flag design incorporated into the color placement. It combines the modern appeal of a side French tip with a clear nod to the holiday through its color choice and detail work.
This design is a good pick if you like the side French trend but want to make sure it reads as clearly patriotic. The flag element adds just enough detail without overwhelming the overall clean, modern shape.
Tips for a Flag-Accented Side French
- Keep the flag detail small and placed along the side line for balance
- Use a striping brush for the flag’s stripe details
- This design works best on longer nails where there’s more room for detail
36. Cute July 4 Nails
Half-white nails paired with pink and red star accents bring a slightly softer, more feminine spin to traditional patriotic colors. Swapping in pink alongside the classic red and blue makes this design feel fresh rather than a repeat of the usual palette.
This is a fun option if you want your holiday nails to feel a little different from the typical red-white-and-blue lineup. The half-white base keeps things clean while the stars add just enough personality.
Tips for Adding Pink to a Patriotic Palette
- Use pink as an accent color rather than a dominant one
- Keep the white base clean and glossy for the strongest contrast
- Star decals are a quick option if freehand painting isn’t your strength
37. Red Blue White Nail Art
Several different accent styles come together across one set in this fully artistic design, mixing dots, lines, and small shapes for a look that feels custom-built rather than following a single pattern. It’s one of the more advanced options on this list.
This design works well for anyone who genuinely enjoys the process of nail art and wants a set that showcases a variety of techniques. Because each nail carries something different, no two fingers look exactly alike.
Tips for Multi-Technique Nail Art
- Plan which technique goes on which nail before starting
- Keep the same three-color palette throughout for cohesion
- Use different brush sizes for the different techniques and details
38. Red Blue and White Nail Art (Tie-Dye Edition)
A more graphic take on tie-dye nail art uses bolder color saturation and tighter dye patterns for a look that reads as intentional rather than soft or blended. It’s a step up in boldness from the softer tie n dye design earlier on this list.
This version works especially well if you want your tie-dye nails to photograph clearly, since the bolder saturation shows up more distinctly than a softer blend. It’s a strong choice for anyone who wants nail art that feels current and eye-catching.
Tips for Bold Tie-Dye Nail Art
- Use less water or thinner when blending for more saturated color
- Work in small sections rather than trying to dye the whole nail at once
- A glossy top coat enhances the vibrancy of bold tie-dye colors
39. Simple July 4 Nails
A side French design gets layered with red and blue color plus small white stars for a look that combines two popular trends — side French tips and star nail art — into one cohesive design. It’s simple enough to recreate but still visually detailed.
This is a great choice if you like the idea of side French nails but want a bit more holiday-specific detail than color alone provides. The stars add just enough extra interest without complicating the overall shape.
Tips for Side French with Star Details
- Add the side color first, then layer stars once it’s dry
- Keep stars small and placed near the colored side for balance
- White nail art pens make quick, clean star details
40. Sparkly Mix
An ombre base gets balanced out by a single glitter accent nail, using the ombre design on the rest of the fingers to keep the sparkle from feeling overwhelming. It’s a smart way to include glitter without going overboard across all ten nails.
This design is a good option if you love glitter but find a full glitter manicure too intense for daily wear. Limiting the sparkle to one accent nail keeps the overall set balanced and wearable.
Tips for Balancing Glitter and Ombre
- Choose your ring finger or another single nail as the glitter accent
- Keep the ombre base soft so it doesn’t compete with the glitter nail
- Seal the glitter accent with extra top coat to prevent snagging
41. Easy 4th of July Nails
Sparkly red, white, and blue polish paired with two design-focused accent nails keeps this look understated but still glamorous. Most of the nails stay simple and sparkly, while just a couple carry extra detail, striking a nice balance between effort and impact.
This is a good option if you want a manicure that feels complete and polished without requiring nail art on every single finger. The sparkly base alone does a lot of the visual work.
Tips for Two-Accent-Nail Designs
- Choose your ring fingers as accent nails for a balanced, symmetrical look
- Keep the sparkly base consistent across all other nails
- Simple stars or dots work well as the accent nail detail
42. Simple Sparkly Mani
Sometimes the easiest path to festive nails is simply choosing a sparkly polish and letting the glitter do the work. This design skips patterns, dots, and stripes entirely, relying on the color and shimmer alone to feel appropriately celebratory.
This is one of the fastest, lowest-effort options on the entire list, making it perfect for anyone who wants festive nails without spending much time on them. It’s an easy weeknight manicure that still photographs beautifully.
Tips for a Quick Glitter Manicure
- Two thin coats of glitter polish give better coverage than one thick coat
- A glitter-specific top coat helps smooth out the texture
- Choose a red, blue, or silver glitter shade to keep the holiday connection clear
43. Funky Blue Nails
For anyone who wants to break away from the standard red-white-and-blue formula, this design leans into an unexpected color palette while still keeping a playful, artistic energy. It’s a reminder that patriotic nails don’t have to follow the same rules every year.
This is a great pick if you love nail art but want your set to stand out from the more traditional designs on this list. The funkier color choices make it feel fresh and personal rather than formulaic.
Tips for Non-Traditional Patriotic Nail Art
- Choose one unexpected color to anchor the design, then build around it
- Keep the overall shape playful with dots, lines, or abstract shapes
- This design works well as a way to personalize a holiday manicure
44. 4th of July French Tips
A straightforward, festive twist on the traditional French tip rounds out this list as one of the most classic and easy-to-recreate options. Simple, clean, and effortlessly pretty, it proves that a great French manicure never really goes out of style, holiday or not.
This design is ideal if you want something polished and put-together without much fuss. It pairs easily with any outfit and works for both daytime gatherings and evening fireworks displays alike.
Tips for a Reliable French Tip Finish
- Nail guides make it much easier to get straight, even tip lines
- Two thin coats of tip color give better opacity than one thick coat
- A high-shine top coat gives this classic style its polished finish
45. Nude French With a Blue Hint
Closing out the list, this design keeps things elegantly simple: a classic nude French manicure with just a small hint of blue worked into the tip or accent nail. It’s proof that even the smallest patriotic detail is enough to make a manicure feel seasonally appropriate.
This is one of the most versatile, wearable options here, easily transitioning from the holiday into everyday wear without needing any changes. It’s a great pick if you want festive nails that still feel like “you.”
Tips for a Minimal Patriotic Accent
- Add the blue detail to just one or two nails, keeping the rest classic nude French
- A thin liner brush works well for a subtle blue tip line
- This design requires little upkeep and grows out gracefully
FAQs
How long does a 4th of July manicure typically last? With a good base coat and top coat, most of these designs last 7–14 days on standard polish, or up to three weeks with gel.
What’s the easiest design on this list for nail art beginners? Half Red Nails, Matte Blue Manicure, and Simple Sparkly Mani are the most beginner-friendly, since they rely on clean color application rather than freehand detail work.
Can I recreate these designs with press-on nails instead of polish? Yes. Many of these patterns, especially the color-blocked and ombre designs, translate well to press-ons if you’re short on time or want a no-mess option.
Do these designs work for short nails as well as long ones? Most do. Designs with negative space, side French details, or simple color blocking tend to look especially clean on shorter nails, while more detailed illustrative designs often show up better with a bit of extra length.
How to Keep Your Holiday Manicure Looking Fresh All Weekend
A great 4th of July manicure should survive the whole celebration, not just the photos beforehand. Start with a clean, oil-free nail bed so polish adheres properly, and always apply thin, even coats rather than thick ones for better durability. Finish every design with a strong top coat, and carry a small bottle with you to reapply after swimming or extended sun exposure. For designs with foil, glitter, or rhinestones, sealing the edges carefully prevents snagging on towels, clothing, or blankets during a long day of festivities.
Final Words
With 45 different directions to choose from, there’s no reason to settle for a rushed, last-minute manicure this Independence Day. Whether you gravitate toward soft nude tones, bold glitter, or detailed hand-painted art, save the designs that speak to you and bring them along to your next nail appointment — or grab your polish and give one a try yourself.
Don't miss the next one
Quick outfit ideas and beauty tips, straight to your inbox.